

Why is the 'bleed area' so important in design drafts?
For those new to creating print drafts, the term 'bleed' might be unfamiliar.?
The reason why "bleed" is important is that during printing, the paper is much larger than A3 or A4 sizes. Multiple pages of images and text are printed on it using a printing press and then cut to the specified size. The crop marks (cutting marks) indicate where to trim the paper.
Bleed refers to the extra space between the trim size and the design size. Although the bleed area is small, it significantly ensures the completeness of the printed product's image.
Bleeding space
The standard bleed size for printed materials is usually 3mm. This means adding an extra 3mm to each side of the final product dimensions. For example, if a card size is 90 x 54mm, the bleed size would be 96 x 56mm (90+3+3, 54+3+3). For magazines or advertisements where the image fills the entire page, you can extend the background color and images to the bleed size. This way, even if the paper is not perfectly aligned during trimming, there will be no white edges left.
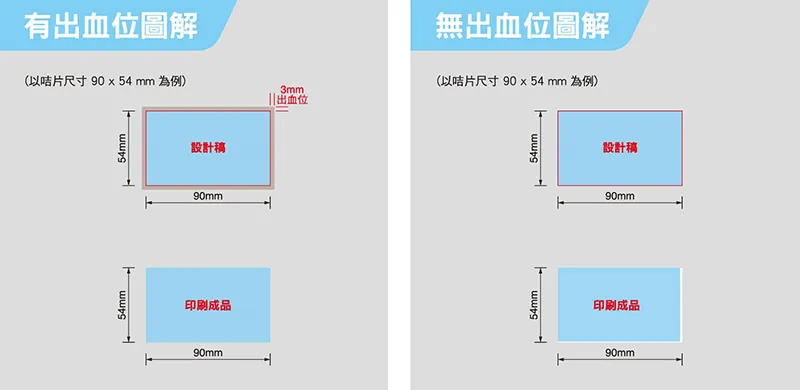
[With or without blood level design draft and finished product drawing]
How to set bleeding space?
Let's start with the preparation of pre-press documents
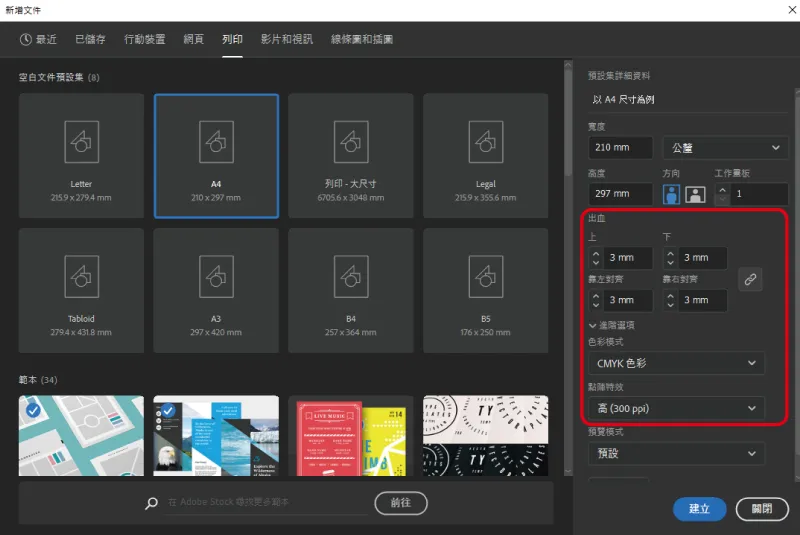
When creating a new document, whether it's for a brochure, flyer, or packaging, we need to set the color mode to CMYK and establish a 3mm bleed.
After finalizing the finished product dimensions (the unfolded die-cut layout of the packaging), immediately create the crop marks.
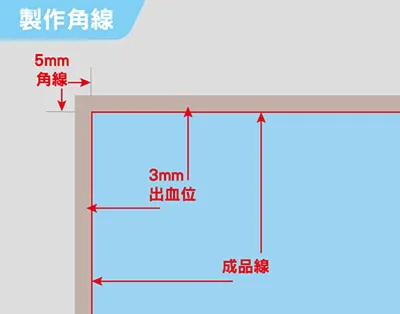
Crop marks are two 5mm lines, one vertical and one horizontal.
The settings in AI are as follows:
Illustrator 8-CS3
Filter>Establish>Crop marks
CS4
Effect>Crop marks
C55-CC
Effect>crop marks
Property>Create crop marks
After setting up the bleed and crop marks, you need to set the margin. There is no specific size requirement for the margin, but it should be at least 3mm away from the crop marks on all sides. For packaging, it is generally set to 5mm.
How to add crop marks in InDesign
InDesign does not set crop marks within the document; you can only pre-set the bleed size when creating the document. If you need to set crop marks, you can do so when converting to PDF.

